|
45/52 |  |
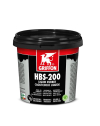
Griffon Liquid Sealing Rubber HBS-200 - 1 kg bucket


 |
 |
 |
Griffon Liquid Sealing Rubber HBS-200 - 1 kg bucket
Description
This high-performance product is designed for reliable sealing, waterproofing, and long-lasting protection of a wide range of building materials. Read more
-
Griffon Liquid Sealing Rubber HBS-200 - Bucket 1 kg
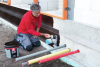
This highly effective product is designed for reliable sealing, waterproofing, and long-term protection of a wide range of building materials. It is fully compatible with a variety of surfaces such as concrete, brick, metals including steel and aluminum, natural and artificial stone, wood, bituminous substrates, zinc, PVC, and, after prior adhesion testing, EPDM as well. Thanks to its versatile formula, it is ideal for application on floors, partitions, walls, piping systems, and various structural elements both indoors and outdoors. It is suitable for demanding projects in bathrooms, basements, on balconies, and roofs, where it reliably seals gutters, shower trays, expansion joints, pipe penetrations, as well as joints between window frames and ground-level structures. In addition, it serves as an exceptionally reliable waterproofing layer directly beneath ceramic tiles and paving in areas with high humidity, such as home bathrooms, wellness areas, swimming pools, terraces, and balconies, where it effectively prevents water from penetrating the structure and ensures professional, long-lasting results.
Features
- Waterproof and airtight
- Very high level of permanent elasticity (900%)
- Excellent adhesion to many substrates
- Durability: at least 20 years (tested according to EN 1297)
- Protects against corrosion and erosion
- Easy application
- Resistant to all weather conditions and UV radiation
- Resistant to salts and chemicals
- Paintable
- Solvent-free
- VOC-free
- Non-toxic
- Water-based
Instructions for Use
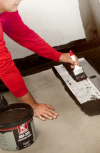
Before application, make sure the surface is perfectly clean, dry, and free of dust, grease, and all loose particles. Carefully cut off the top of the cartridge above the thread with a sharp knife to remove the plastic nozzle insert, then screw the application nozzle onto the cartridge. Cut the nozzle at an angle so that the resulting opening has a diameter of at least 5 mm, using only the special nozzle supplied with the product. Insert the cartridge into the application gun and, depending on the weight of the bonded material, apply the adhesive evenly in vertical strips or dots at intervals of 10 to 40 centimeters. Be sure to apply the adhesive in corners and along the edges of the material as well. If you need to allow for movement and expansion between materials, for example when installing façade boards, apply a 3 mm thick layer of adhesive, using spacers or tape if needed. Then install the individual materials with a sliding motion, press them firmly together, or tap them into place with a rubber mallet; slight position adjustments are still possible at this stage. If you are using the product as a sealant, apply it evenly directly into the joint, use a suitable smoothing agent on the surface, and within 10 to 15 minutes of application smooth the joint with a damp tool or finger. After finishing, allow the applied material to cure completely without disturbance and close the cartridge carefully to prevent the remaining material from drying out.
-
Related products
Price incl. VAT: 15,00 GBPAvailability:
Price incl. VAT: 16,00 GBPAvailability:
Price incl. VAT: 59,00 GBPAvailability:
Price incl. VAT: 16,00 GBPAvailability:In stock
Price incl. VAT: 6,00 GBPAvailability:
Price incl. VAT: 9,00 GBPAvailability:
Price incl. VAT: 12,00 GBPAvailability:
Price incl. VAT: 23,00 GBPAvailability: